
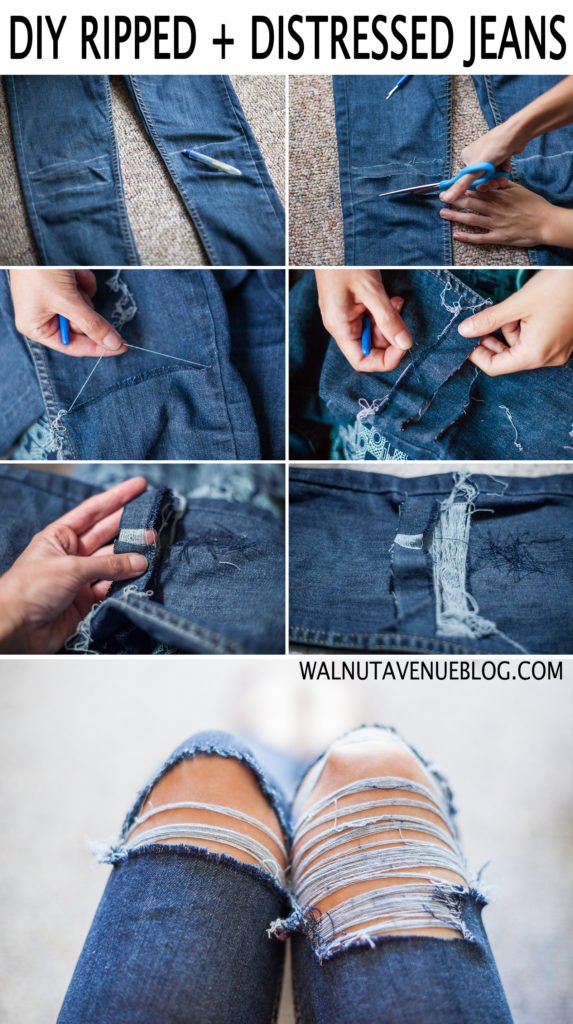
DIY Distressed Ripped Jeans Tutorial
I love the look of ripped jeans on other girls. The destroyed look gives a sexy glimpse of skin beneath the tough surface of torn work cotton. Ripped skinny jeans and boyfriend jeans have become a mainstream trend that's here to stay. Pre-trashed pants are available from most brands and in all colors. They're dressed up with heels or dressed down with flats. They convey a laid-back, don't-give-a-fuck attitude. When I was younger, I wore fishnets underneath (clumsily) self-ripped jeans for a fun flash of color and texture.
DIY frayed distressed jeans tutorial
As a short-legged girl, I find regular pants shopping hard enough without the added element of hole placement. I've tried on dozens of pairs of ripped jeans over the years, with no success. Usually I end up with the knee slit over my shin. The few pairs I've liked were way too expensive. I've even ruined a few old pairs trying to get the look down. Recently I discovered some techniques that totally changed my DIY-ing life. Here's a DIY tutorial that shows you how to create distressed and ripped jeans or shorts on your own.
What you need:
denim non-stretch jeans
scissors
seam ripper (optional)
chalk (optional)
**Consider thrifting a pair of jeans to practice on if this is your first time shredding something up! Thrifted denim also makes perfect candidates for boyfriend jeans.
Version One: The Simple Slit
You don't have to go whole hog the first time you create diy frayed denim. The Simple Slit is is easy and produces a more low-key look. It's perfect for over the knees, and is often seen on black jeans. It also forms the basis for larger holes and the whole un-fraying process.
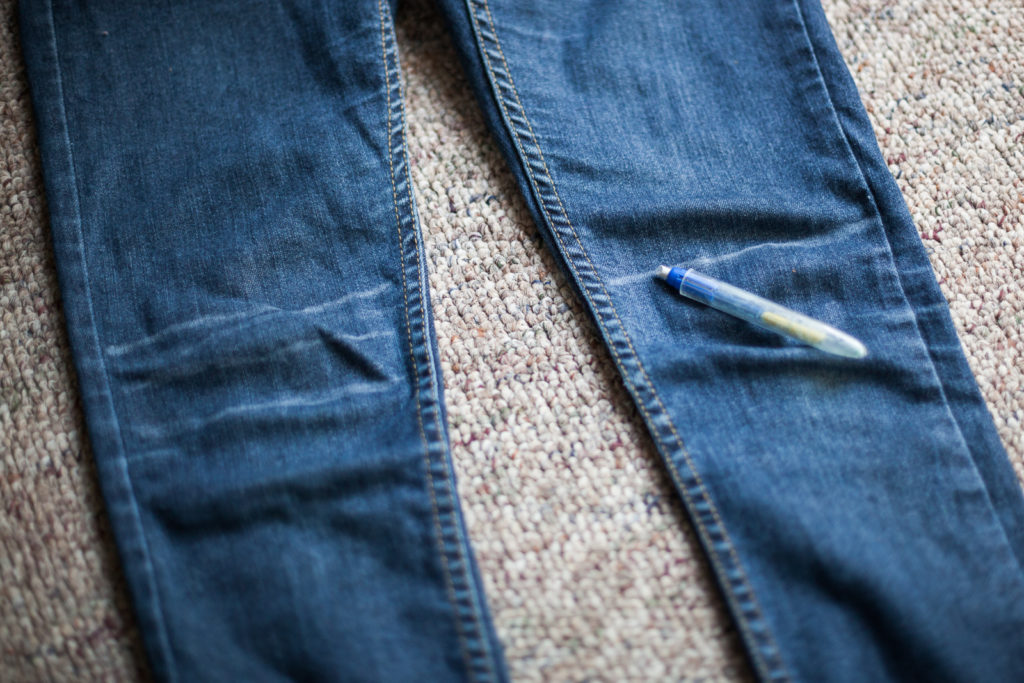
Mark the Knees
You don't have to buy chalk if you don't have it; try pencil or use pins. Put on your jeans a draw a line right over your kneecaps as a guide. Mine were super saggy and stretched out there - yet another great reason to shred them up a give them a make-over (or is it a make-under?)
1 DIY ripped jeans
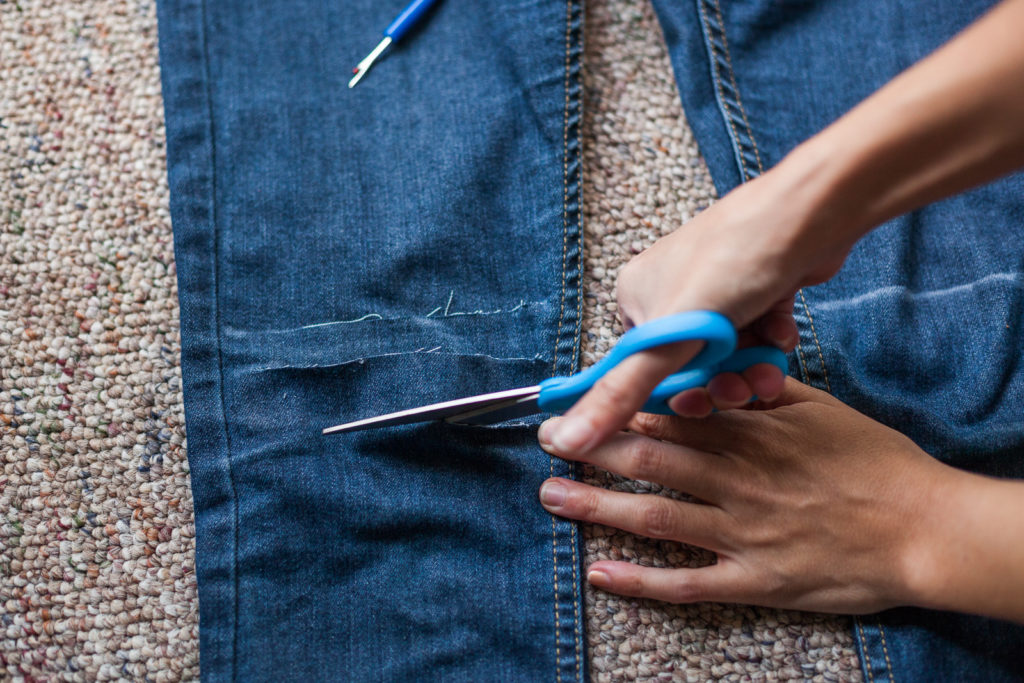
2. Make The Cut
The seam ripper is also non-essential, it just makes starting the cuts a a lot easier. If you don't have one, pinch your jeans at one edge of the line and snip with the scissors to create a starting place to finish. Finish cutting along the line.

2 DIY ripped jeans
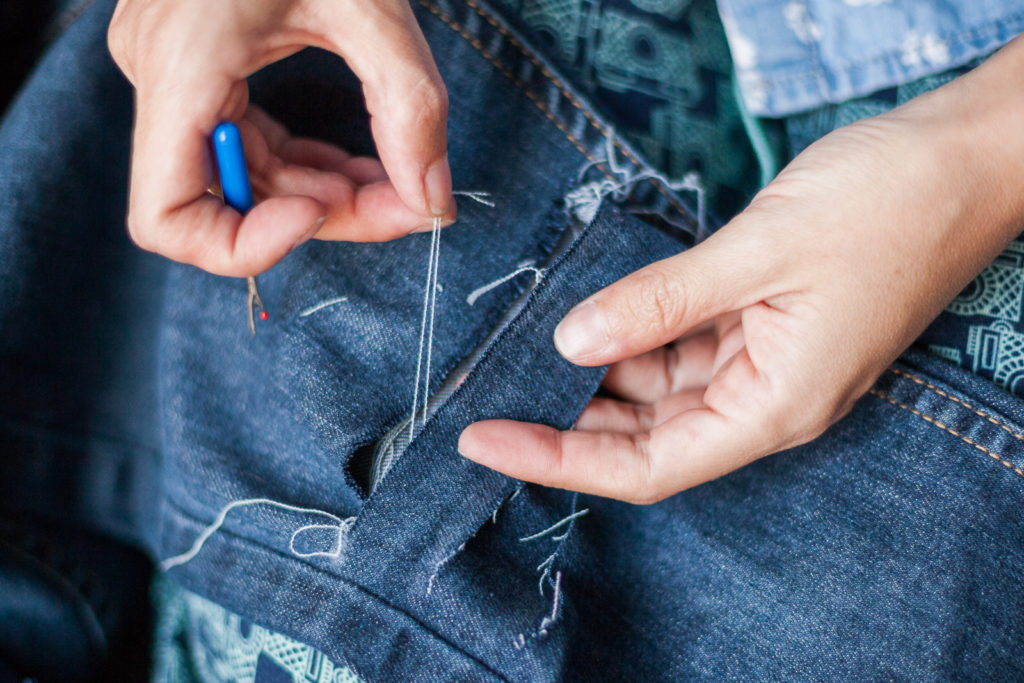
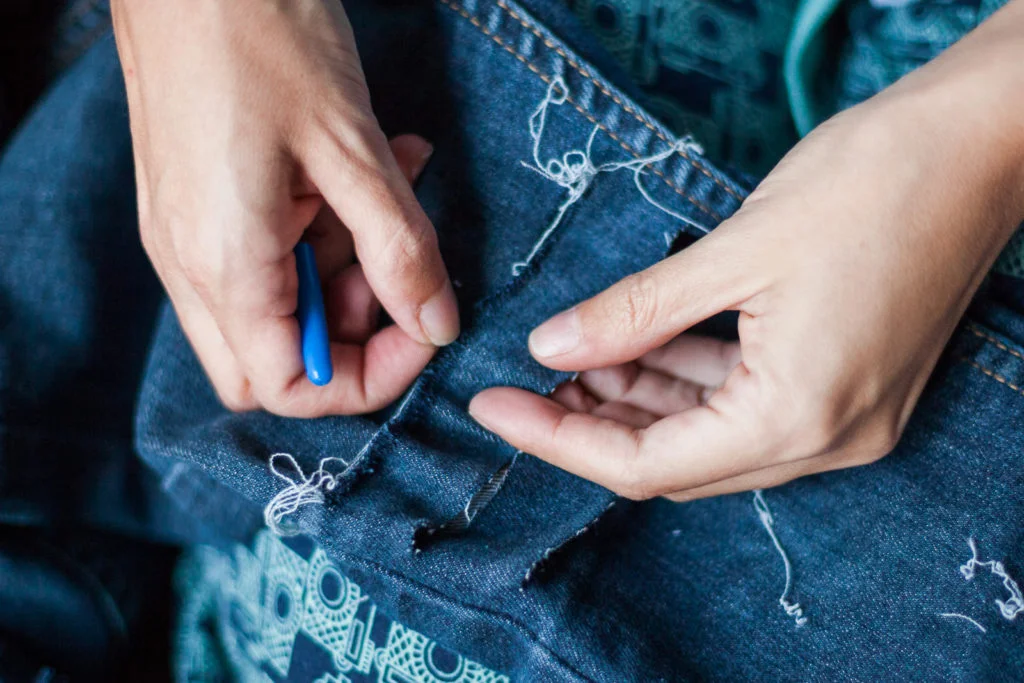
3. Start to unravel
Cutting into most denim will reveal the horizontal woven threads, which will most likely be white. The blue (or colored) denim part makes up the vertical threads. Start with the cut white threads, pulling them to the side. Use the point of the seam ripper or a safety pin to help loosen them if they get snagged up in the vertical threads. Stretching the denim periodically helps, too.

6 DIY ripped jeans

7 DIY ripped jeans
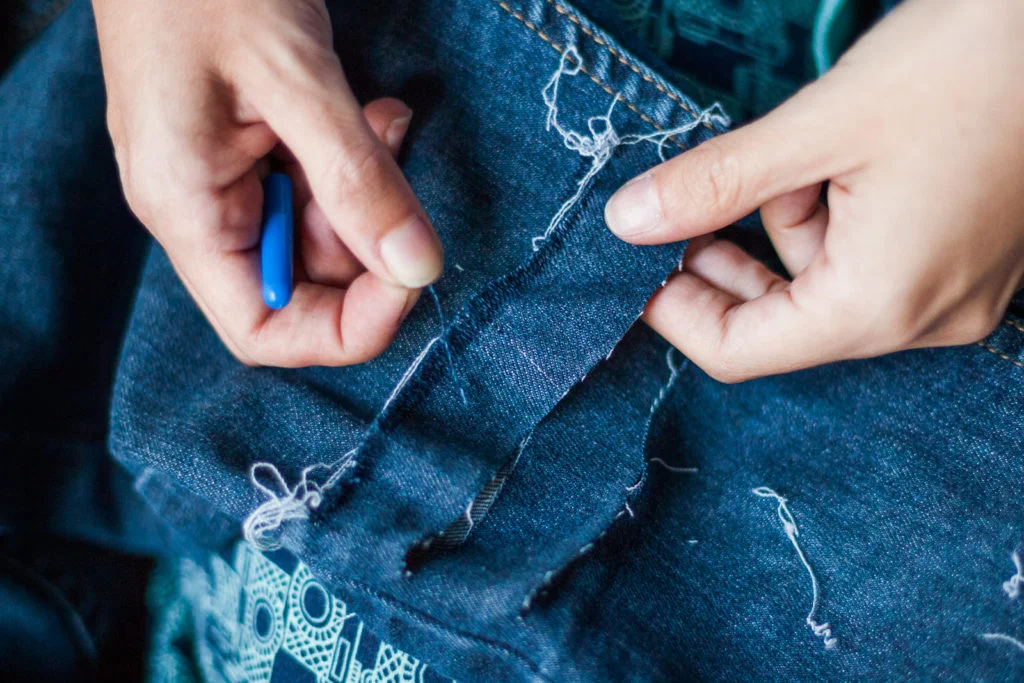
4. Keep unraveling
Once the loose threads are removed or pulled aside, you'll start getting down to the uncut strands. These strands are still connected at each end of the slit. Start gently pulling these up and out of the vertical strands, being careful not to break them. The more broken or removed white threads, the more skin will show through.

9 DIY ripped jeans

10 DIY ripped jeans

11 DIY ripped jeans
For this minimal style, you only need to pull out several whole threads from the top and bottom of the slit. If you want to stop here, fine! Wash your jeans to fuzz up the frayed edges. Or, keep going to Version Two for instructions on how to DIY the larger, patch-like holes...
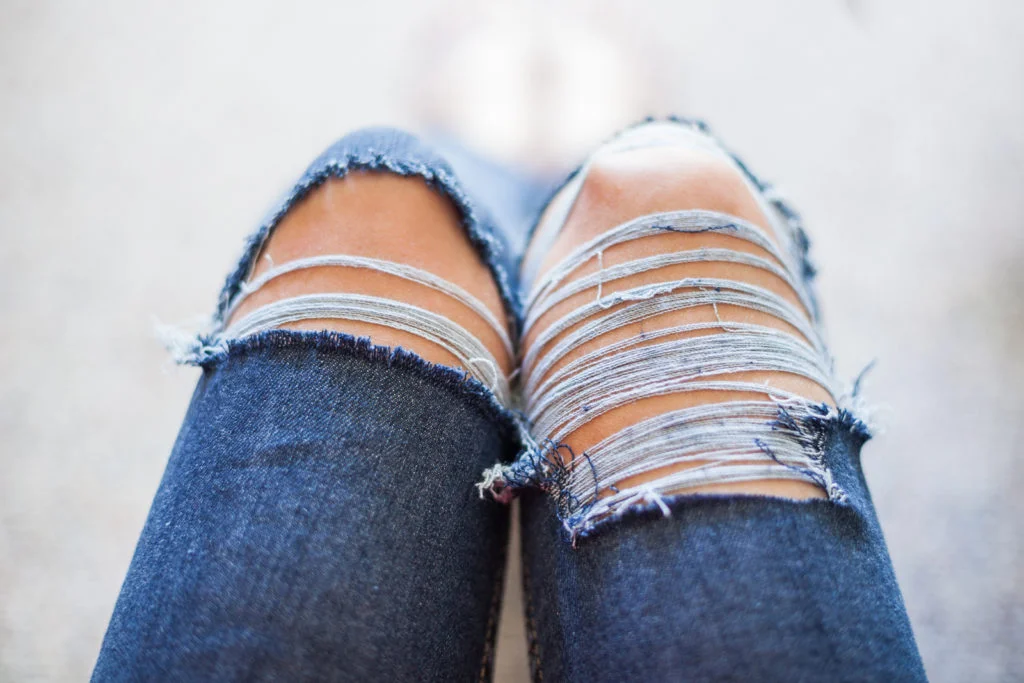
Version Two: The Full Fray
Theses steps will make larger, skin-baring open spaces, crossed by horizontal threads.
Mark the guidelines & Make the Cuts
Just like before, mark your guidelines by starting at the knee. Then make a parallel cut about one inch above and one inch below this line, making them slightly shorter. No need to measure.
4 DIY ripped jeans
2. Start to Unravel
Repeat the same steps as above to remove the loose threads and loosen the cut edges. Keep unravelling this way as long as it's easy. Some weaves will loosen more easily than others. Repeat on all cut edges to make unravelling easier.
12 DIY ripped jeans
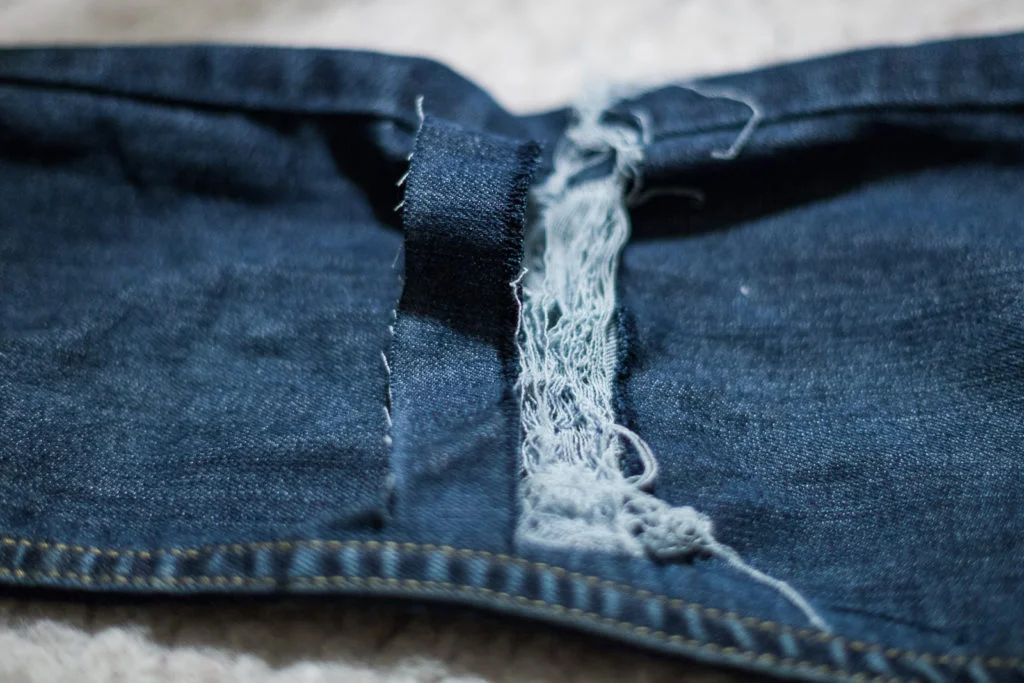
3. Switch to Pulling the Other Threads
Now that you've loosened up the edge and pulled out some horizontal white threads, switch your focus to the vertical blue threads. Getting started is the trickiest part. Try to grab the end of one single strand and pull it out. Use tweezers if needed. This will of course only work on the strips that have a cut edge on opposite long sides.
13 DIY ripped jeans
14 DIY ripped jeans
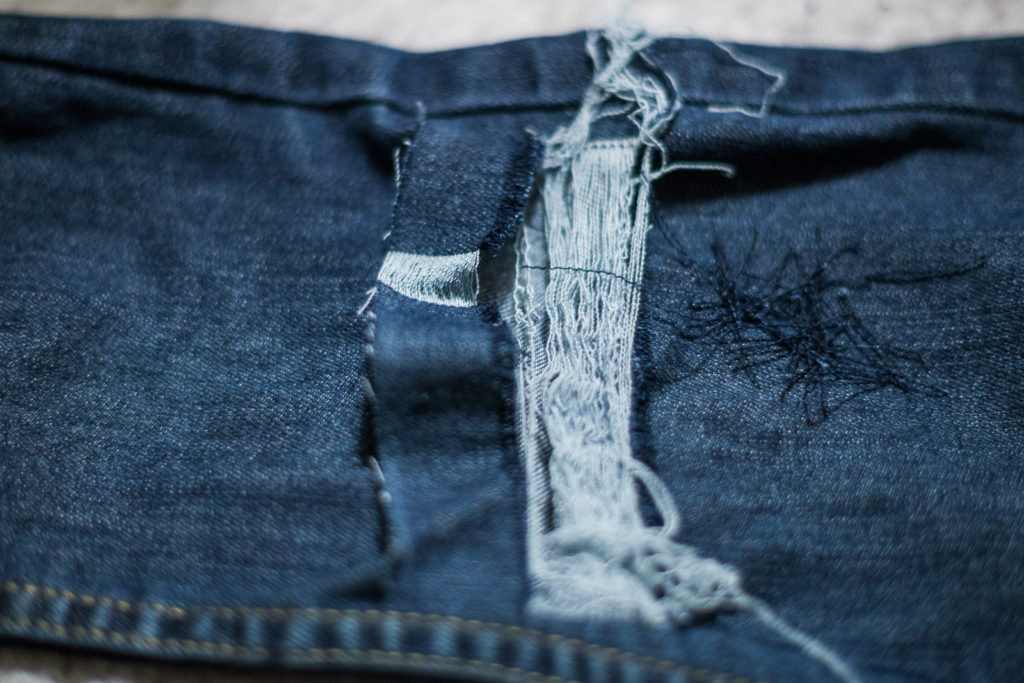
4. Fray Away!
Now you've got the basis for some serious shredding! Keep going. Once you get a good open space, you can start pulling out a few threads at a time. This part can be tedious, so make sure to put on something to help pass the time! I listened to Parks 'n Rec ;) Repeat to shred all the strips.

17 DIY frayed jeans

18 DIY distressed jeans

19 DIY ripped jeans
DIY ripped jeans tutorial
DIY ripped jeans tutorial
Try on your jeans periodically to check out whats happening. Mark new guidelines with chalk, if desired. Do as much or as little as you want! I wanted one knee hole to have a rounder look, so I added a smaller strip above the main two. Go ahead and look at pictures of torn up jeans to get an idea for placements. Smaller holes over the shin, longer ones up the thigh. Just be sure to make small changes at first. You can always do more, but you can't go back.

DIY ripped jeans tutorial
4. Fray the hems & ends
Repeat the first few steps to crop and fray the hems. Wash and dry your jeans to make all the edges and loose strings look more distressed.

DIY ripped jeans tutorial

15-2 DIY frayed jeans
Voila! What do you think?
DIY Distressed Ripped Jeans Tutorial